Articles in this topic
Templates, colours and fonts
Give your website its look — start from a ready-made template, or pick your own colours, fonts and background.
6 min read
The look of your website is set in two places: a template gives you a complete website in one go, and the Site tab lets you fine-tune the colours, fonts and background. Like everything in the editor, design changes go to your draft first — guests see them after you publish.
Good to know
Changes in the Site tab are not saved automatically. The preview shows them after you click Save All Settings at the bottom of the tab. See Save your design.
Start from a template
A template is a ready-made website — pages, modules, colours and a font — that you then fill with your own texts and photos. Before anything is written to your draft, a short guide shows you what you get and lets you decide the big things, so you don't have to take it as it comes. It is the quickest way to a good-looking website.
-
Click the Templates button in the toolbar (1) — the icon with three blocks.

The Templates button in the toolbar (1) -
The gallery Choose a Template to Get Started opens. Click Restaurant, Event Space or Event (1) to see only the templates for your kind of business. Each card (2) shows a picture, the colours, the font, how many pages and modules the template has, and which of your data it uses: green means you have it ("Menus 5"), amber means it is still missing ("Photos: none yet").
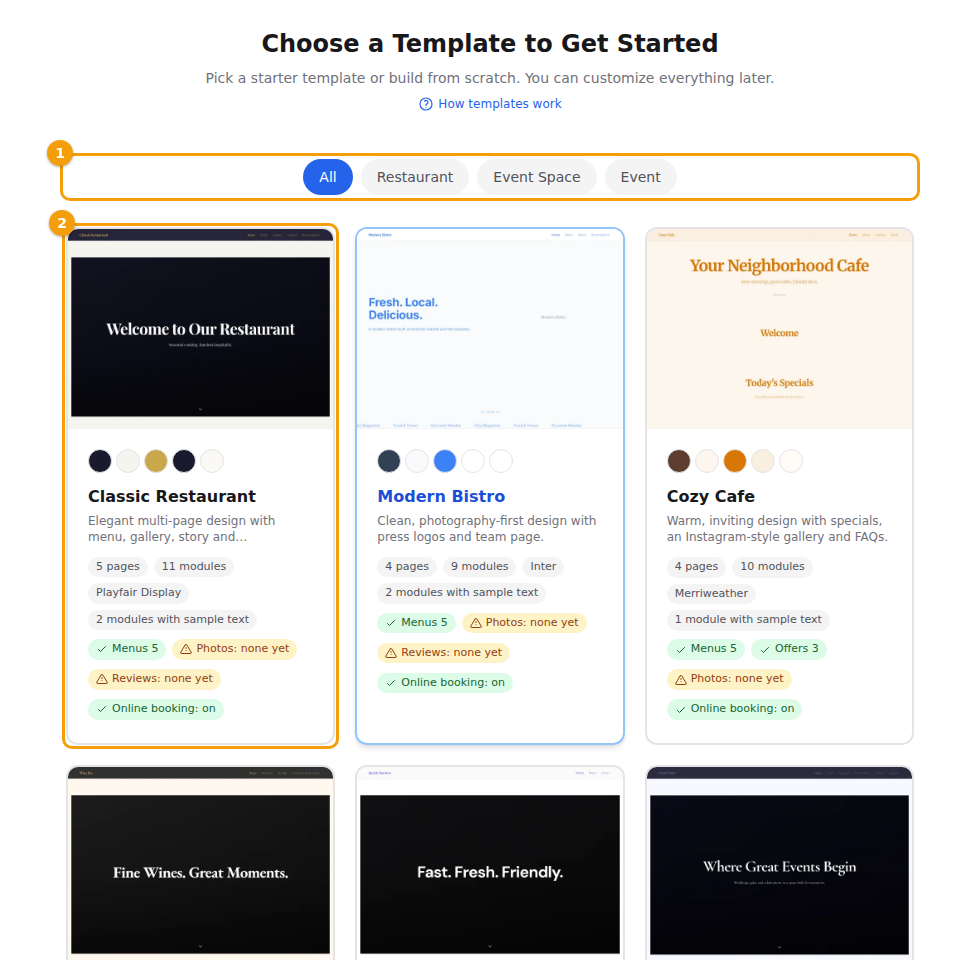
Filter the templates (1) and click the one you like (2) -
Click the template you like. It opens in full: the pages with their modules (1), the colours and the font, and what your venue is missing for it (2). Modules marked Sample text hold example facts, such as prices or opening years, that you replace later. Click Customise (3) to go on, or Back to templates to look at another one.
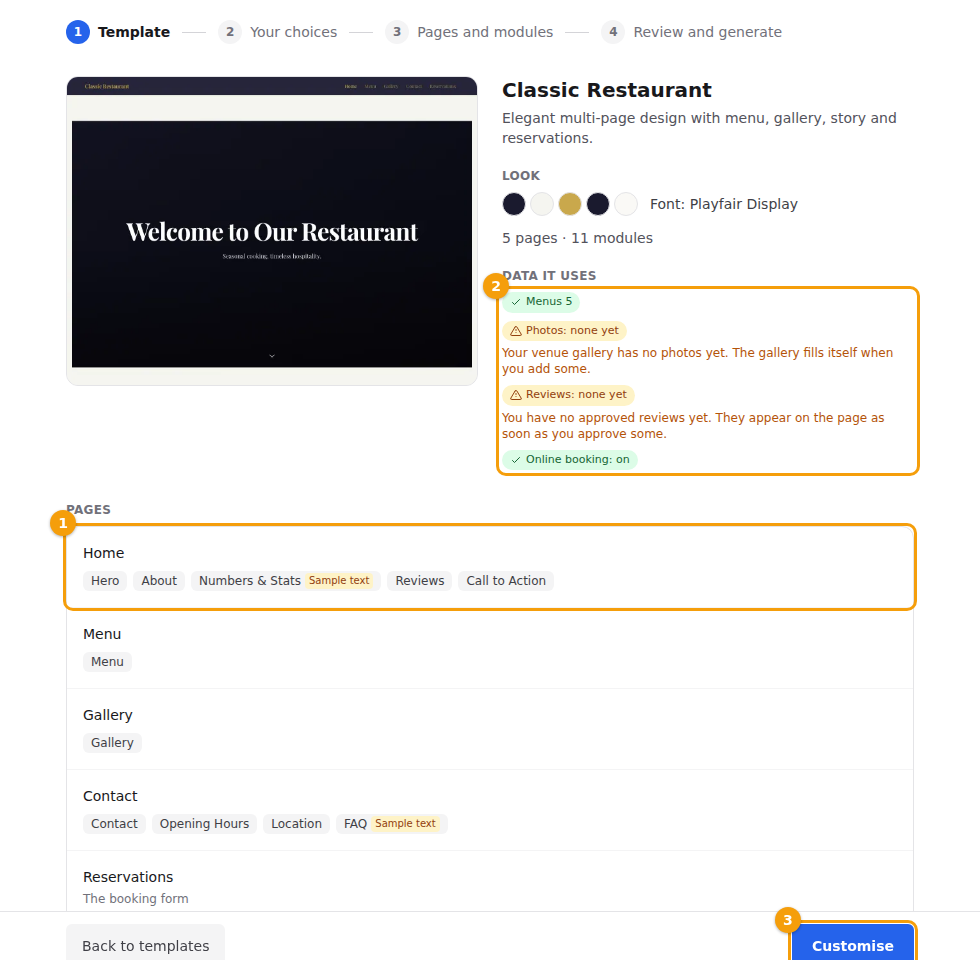
The pages and modules (1), what is missing (2) and Customise (3) -
Your choices. A few big decisions: one page or several, how your menus appear, how guests book, and whether your other locations are listed. Each question has a Suggested answer (1) with the reason, taken from your venue — so you can also just click Next (2). You only see the questions that apply to you. What each option does is explained in What the template choices do.
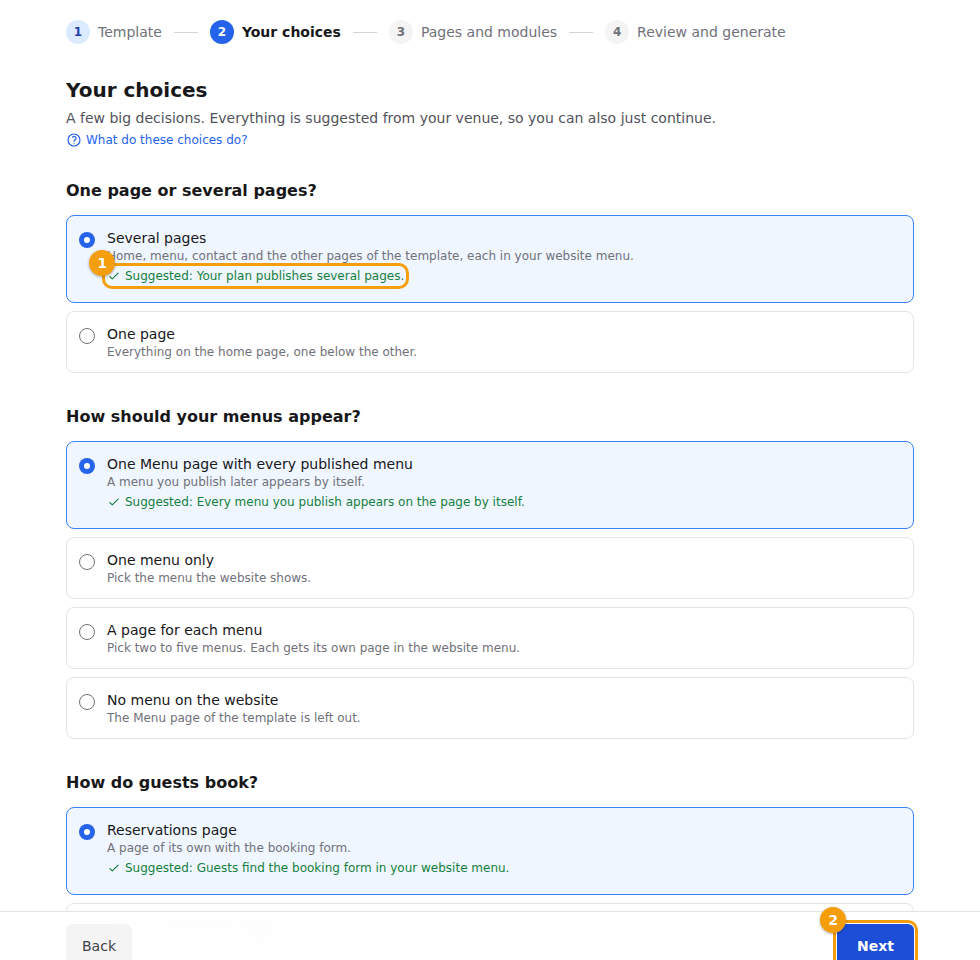
A choice with its suggested answer (1) and Next (2) -
Pages and modules. Everything the template builds is a tick box: untick the pages (1) and modules (2) you don't want. Modules your venue has no data for yet — for example a gallery without photos — start unticked with the reason underneath; tick them anyway and they fill themselves later. A lock (3) means the row cannot be changed, for example the home page. Added marks a module that the template doesn't have but your venue could use. The numbers at the top show what you will get.
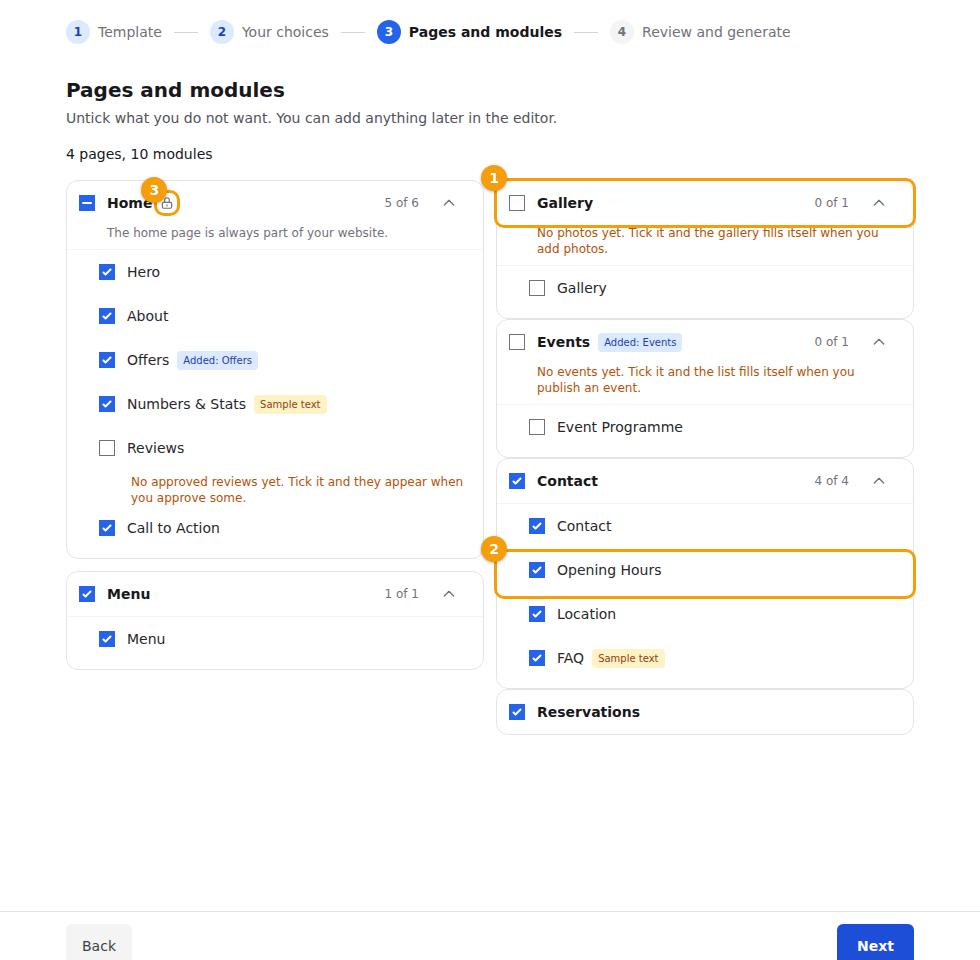
Pages (1), modules (2) and a locked row (3) -
Review and generate. One last look: the totals, what the choices changed for you, how many modules hold sample text, and the reminder that your live website does not change until you publish. Click Generate (1).
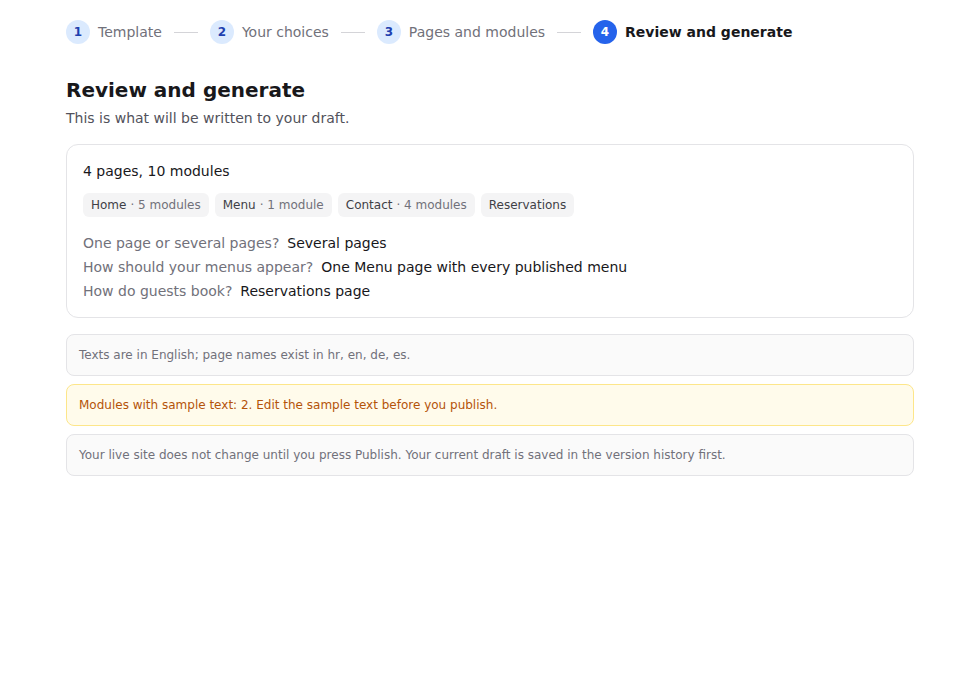
The review and Generate (1) -
If your draft already has content, the editor asks Replace your draft with this template? Click Replace draft (1) to go ahead, or Cancel (2) to keep your draft as it is.
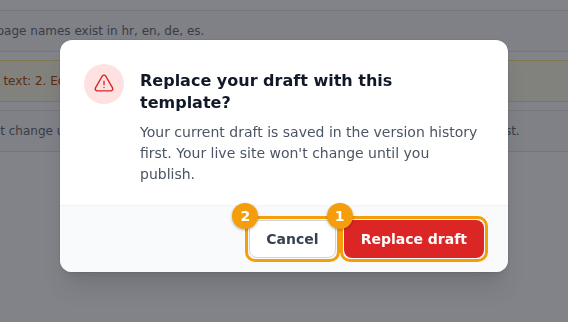
Replace draft (1) or Cancel (2) -
The editor reloads with the template in your draft and says Template applied to your draft. Click Publish when you are ready. Replace the example texts and photos with your own, then publish.
Good to know
The templates Series home page (with the pages Home, Members and Sign in) and Meetup page are offered only when you edit the website of a series or of one of its meetups. You will not see them on your location's website. See The series website and its design.
Important
A template replaces all pages and sections of your draft, and its colours and font. Your site title, languages and your menu and footer links stay as they are. If you have typed your own menu or footer links, check them afterwards: they may point at a page the template does not have.
Tip
Your previous draft is not lost: it is saved in the version history first, and your live website doesn't change until you publish. Changed your mind? Open the old draft again from the version history. See Saved drafts.
Good to know
Does your plan publish only one page? Then there is no choice between one page and several: the template is combined into one page on your home page, so that you can publish it. A template with several pages says so on its card.
To close the gallery without choosing a template, scroll to the end and click Start from Scratch — when you opened the gallery from the editor, this simply closes it and your draft stays as it was.
Good to know
Don't mix this up with Change Template at the top of a section. That only changes the layout of that one section; the rest of your website stays as it is. See Choose a layout.
Choose your colours
-
In the side panel, click the Site tab (the globe, the last icon) (1).
-
Scroll down to Color Scheme. A row of colour dots (2) shows the colours you use now, next to the name of your colour scheme. Click Browse Presets (3).
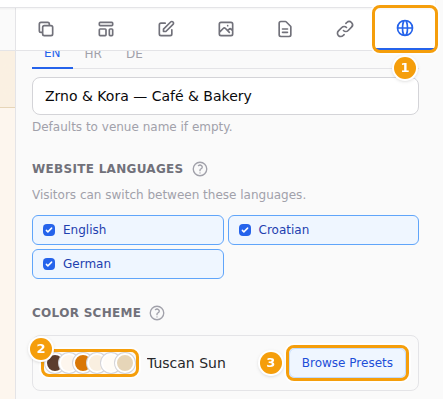
The Site tab (1), your colours (2) and Browse Presets (3) -
Pick a style at the top — for example elegant, warm or natural (1) — then click a colour scheme you like (2). Each one comes with a matching font, shown under its name.
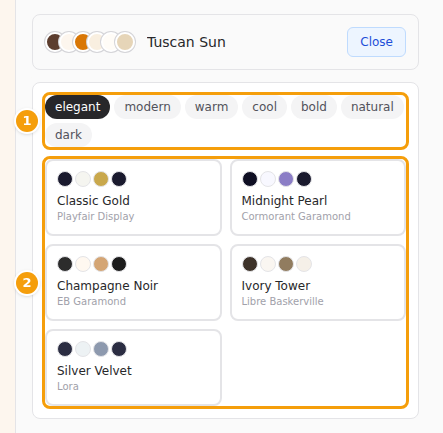
Choose a style (1), then a colour scheme (2) -
The colour dots next to the name change right away. Scroll to the bottom of the Site tab and click Save All Settings — now the preview shows your website in the new colours.
-
Not quite right? Pick another colour scheme and save again. Guests don't see anything until you publish.
Important
A colour scheme brings its own font: picking one also replaces the font you chose before. So choose your colour scheme first, and your font after it — see Choose a font.
Change a single colour
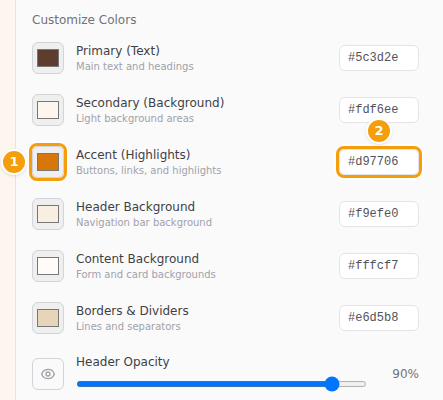
Under Customize Colors you can change each colour of the scheme on its own:
| Colour | Where it is used |
|---|---|
| Primary (Text) | Main text and headings |
| Secondary (Background) | Light background areas |
| Accent (Highlights) | Buttons, links and highlights |
| Header Background | The menu bar at the top |
| Content Background | Forms and cards (for example the booking form) |
| Borders & Dividers | Lines and separators |
- Click the coloured square (1) next to a colour and pick a new colour.
- Or, if you know the exact colour code of your brand, type it in the box on the right (2) — for example
#d97706. - With Header Opacity you choose how see-through the menu bar is: move the slider to the right for a solid bar.
Tip
Keep enough contrast: dark text on a light background (or the other way round) is easiest to read, also on a phone in the sun.
Choose a font
Picked a colour scheme? Choose your font after it, because a colour scheme replaces the font.
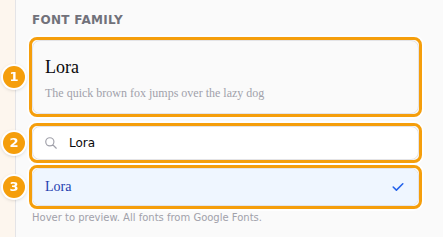
- In the Site tab, scroll to Font Family. The box at the top (1) shows your current font with an example sentence.
- Type a name in the search box (2) — for example Lora — or scroll through the list. Rest your mouse on a font to see how it looks.
- Click the font you want (3). It gets a blue check mark.
- Click Save All Settings at the bottom of the Site tab to see the new font in the preview.
Want a different font for your headings? Under Theme, choose a Heading Font — see Corners, spacing and animations. A classic serif font for headings with a simple font for the text often looks elegant.
Background
The Background Image part of the Site tab sets the background behind your whole website.
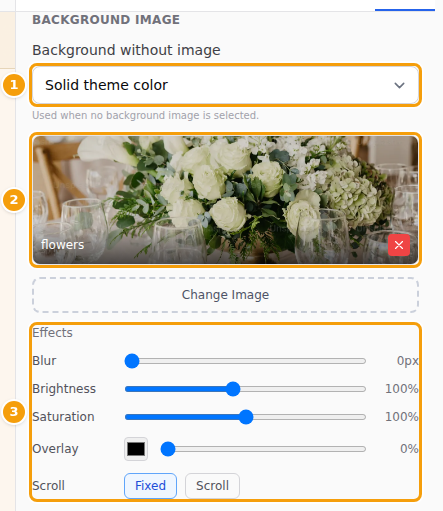
- Under Background without image (1), choose Solid theme color or Soft gradient. This is used when you don't pick a picture.
- To use a photo, click Select Background Image and click one of your images. (Upload it first in the Media tab — see Images.) Your photo appears in the box (2); the red cross removes it again.
- Soften the photo so your texts stay readable (3): Blur, Brightness, Saturation and an Overlay colour with its strength. Under Scroll, choose Fixed (the photo stays in place while guests scroll) or Scroll (it moves with the page).
- Click Save All Settings at the bottom of the Site tab.
Tip
A single section can have its own background photo and colours too. See Background and colours of a section.
Corners, spacing and animations
At the bottom of the Site tab, under Theme:
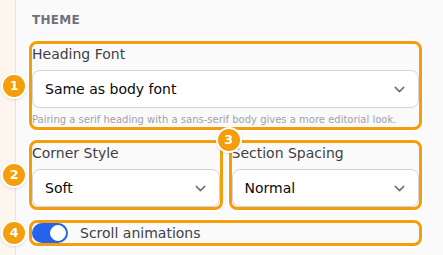
- Heading Font (1) — a separate font for headings, or Same as body font.
- Corner Style (2) — Sharp, Soft or Round corners on buttons, photos and cards.
- Section Spacing (3) — Compact, Normal or Spacious room between the sections.
- Scroll animations (4) — sections gently fade in while guests scroll. Switch it off if you prefer a calm page.
Click Save All Settings to keep your choice.
Save your design
The Site tab has its own save button: changes you make here are not saved automatically.
- Scroll to the bottom of the Site tab and click Save All Settings.
- The button turns green and says Saved! Your design is now in your draft.
- Click Publish when you want guests to see it. See Publish your changes.
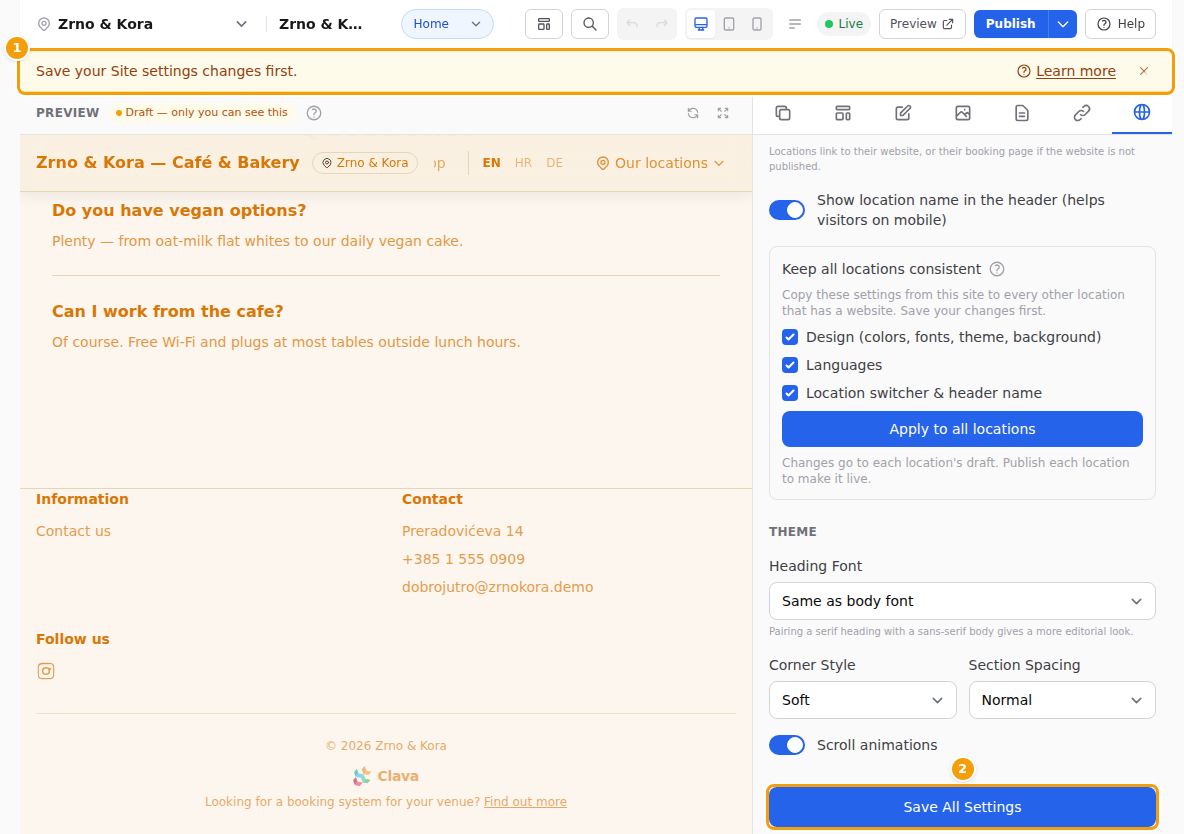
If you click Publish before saving, the editor reminds you: Save your Site settings changes first. (1) Click Save All Settings (2) and then Publish again. Learn more in the reminder opens this help.
Careful
Save before you open another tab in the side panel, switch to another location or leave the editor — otherwise your unsaved Site changes are lost. When you switch location, the editor asks first: Discard unsaved changes?
An event website in your location's design
An event your venue runs itself can have its own website, edited from Events → the event → Edit the event page. To make it look like your location's website, take over that website's design in one click:
- Open the Site tab of the event's website.
- At the top, under Location design, click Copy the … design (with your location's name).
- Confirm with Copy design.
The event website gets the colours, fonts, Theme (heading font, corners, spacing, animations) and background of your location's website — the design guests see there now. Its background photo is copied into the event's own Media. The pages and texts of the event website stay as they are.
Good to know:
- Everything stays editable: change a colour or the font afterwards as usual, and click Save All Settings.
- It is a one-off copy. When your location's website changes later, copy its design again if you want the event website to follow.
- The copy goes to the event website's draft. Guests see it after you click Publish.
- If your location's website is not published yet, the design of its draft is copied; the box says so.
- The box appears only for your own events at a location that has a website.
Your booking form follows your website
Your booking form always uses the colours of your live website — on your website, on your standard booking page, and in the booking widget if you have put one on another website. So when you publish a new design, the booking form changes with it; you don't need to set its colours separately. The same happens when you put an older version back online with Make live.
It also works the other way round: colours you change under Venue Setup → Branding & Design are copied to your website draft.
- If your draft had no other changes, the new colours go live straight away, without publishing. You see Your website now shows the new colours.
- Otherwise you see Open Website Builder and click Publish to apply the new colours to your website. Your other changes are waiting in the draft, so the colours go live together with them when you publish.