Articles in this topic
Photos for your location
Upload, crop and manage your location's photos on the Gallery & Media tab — the same photo library as the website editor's Media tab.
3 min read
Your location's photos live in one photo library. You can manage it in two places: on the Gallery & Media tab in Venue Setup, and on the Media tab of the website editor. Both show the same photos — what you upload in one place is there in the other straight away.
The Gallery & Media tab
- In Venue Setup, click Configure on your location.
- In the list of tabs, click Gallery & Media (1).
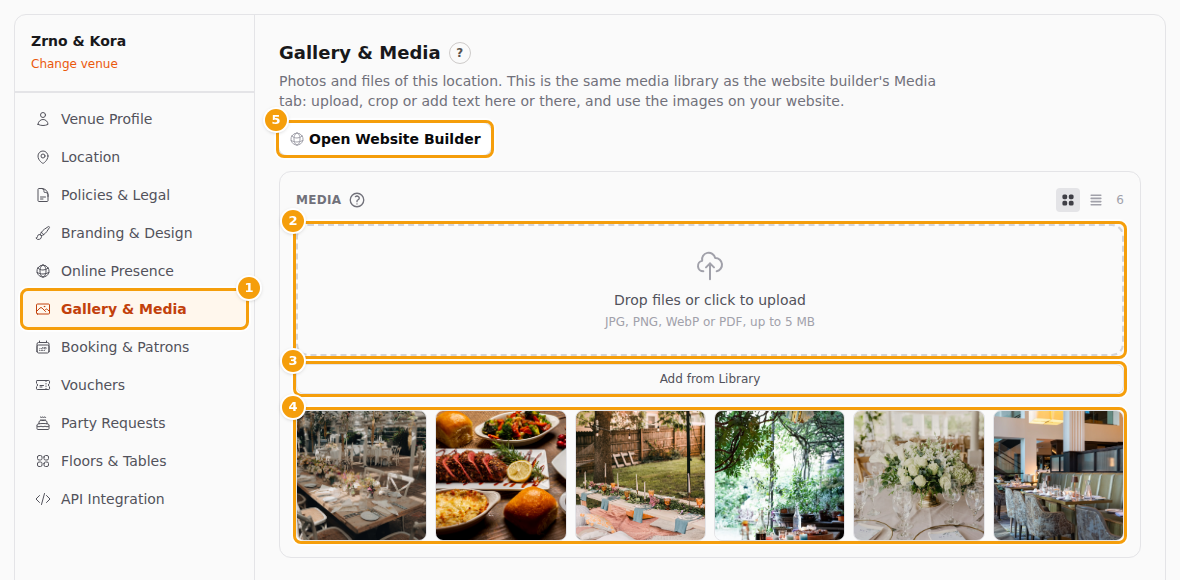
- To add your own photos, drop them on the upload box (2) or click the box and choose them on your computer. JPG, PNG, WebP and PDF files of up to 5 MB are accepted.
- No photos of your own yet? Click Add from Library (3) to pick one of the free photos that come with Clava.
- Your photos (4) are listed newest first. Point at a photo to crop it, add text to it or delete it.
- Open Website Builder (5) takes you to the website editor of this location.
There is nothing to save on this tab: every upload, crop and delete is kept at once.
Good to know
A photo that is used on your website cannot be deleted. Take it out of the section first — see Why can't I delete a photo?
The same photos in the website editor
All the photos of your website come from this library.
- In the menu on the left, under Venue Setup, click Website Builder.
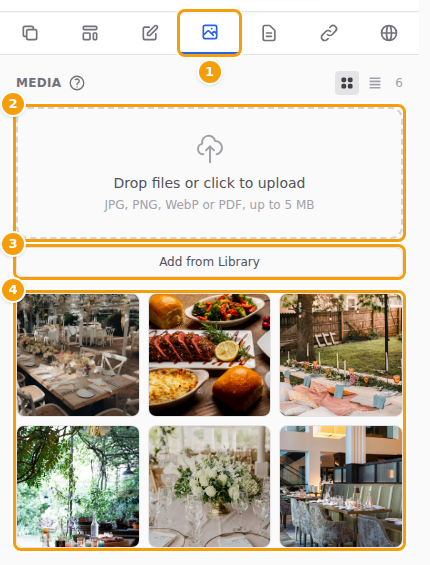
- In the side panel, click the Media tab (1) — the picture icon.
- The upload box (2), Add from Library (3) and your photos (4) work exactly as on the Gallery & Media tab.
A photo only appears on your website once you use it in a section and publish. For the whole story — sizes, cropping, free photos, captions — see Images. The most common jobs are:
- Upload photos to your library.
- Use a photo in a section, for example the big picture at the top of your home page.
- Show several photos together in a Gallery section. You choose the photos in the section itself.
Tip
Do you have more than one location? Each location has its own photos. On the Gallery & Media tab you see the photos of the location you are configuring; in the website editor, choose the location at the top left before you add photos — see Several locations.
Your logo
One picture is set in Venue Setup, on the Branding & Design tab: your logo. See Add your logo. The logo that appears on your website is explained in Your logo.