Articles in this topic
Sign up for Clava
Create your Clava account in about three minutes — the five steps, the email you have to confirm, your free 14-day trial and what you see first.
5 min read
Signing up takes about three minutes. You need no credit card: you start with a free trial of everything Clava offers. When you finish, your booking page is already online.
The five steps
Open the sign-up page (Start Free Setup on the Clava website, or the address /get-started). At the top, the bar
shows where you are. Every step has Continue, and Back takes you to the step before.
| Step | What you tell Clava |
|---|---|
| 1. Account | Your name, email address and phone number |
| 2. Business | The business: name, type, address and currency |
| 3. Hours | When you are open for bookings |
| 4. Settings | How you take bookings: by capacity or by table |
| 5. Review | A last look, then you create your system |
The language buttons EN, HR and DE at the top right change the language of the sign-up pages. Your choice becomes the language of your Clava screens too.
Step 1: Account
-
Type your first name and last name (1).
-
Type your email address (2). It becomes your sign-in name, and Clava sends the confirmation to it. It must not belong to a Clava account already.
-
Add a phone number if you like — it is optional.
-
Read the note (3): you don't choose a password now. Clava creates a secure one for you and sends it by email.
-
Click Continue (4).
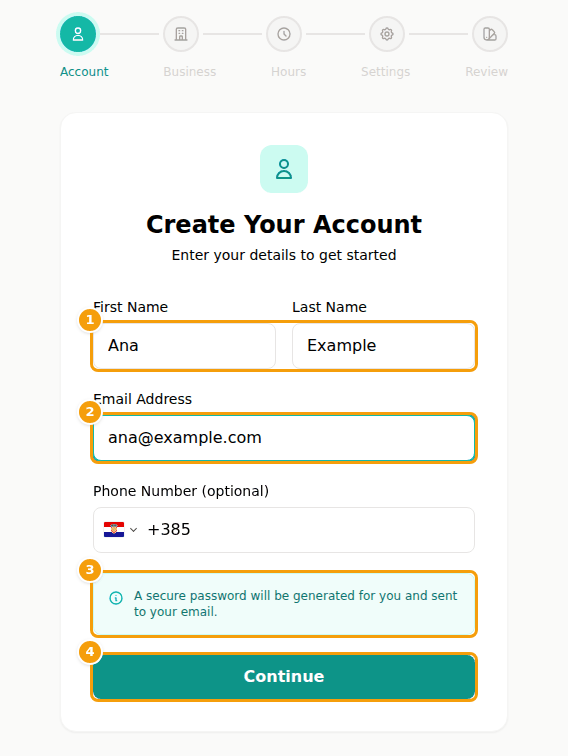
Step 1 of the sign-up: first and last name (1), email address (2), the note about your password (3) and Continue (4)
Step 2: Business
-
Type the name of your business in Business Name (1).
-
Choose the Business Type (2): Restaurant, Bar, Café or Event Venue. Clava uses it to suggest sensible booking settings for step 4.
-
Add a Business Phone and your Website if you like — both are optional.
-
Fill in Street Address, City and Postal Code (3).
-
Choose your Country and Currency (4). The currency follows the country — for Croatia it is EUR — but you can change it.
-
Click Continue (5).
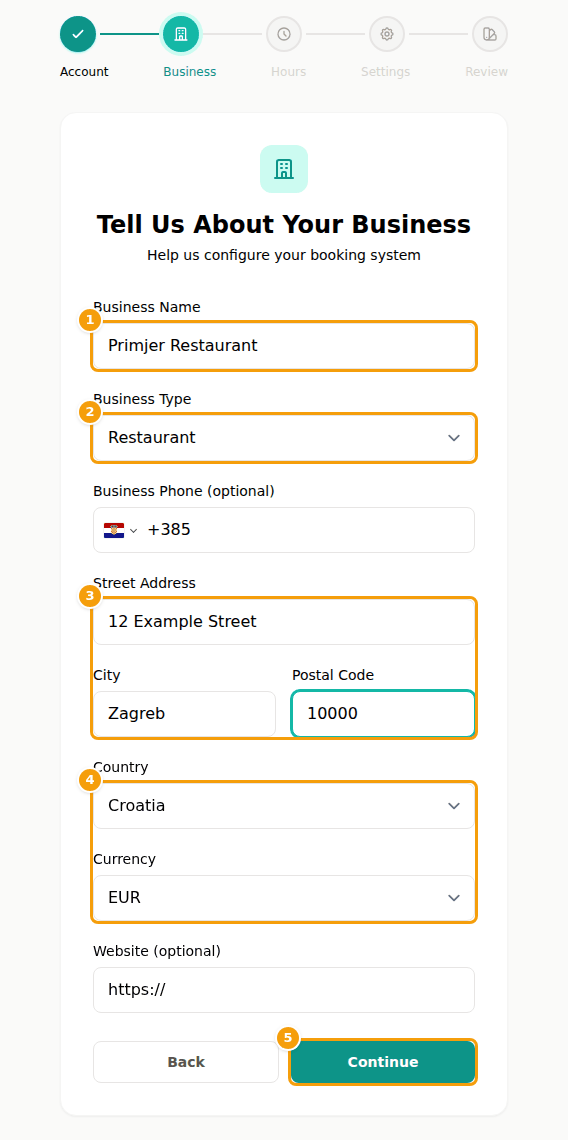
Step 2 of the sign-up: business name (1), business type (2), address (3), country and currency (4) and Continue (5)
Step 3: Hours
Tell Clava when guests can book. For each day you set when you Open and Close, or tick Closed. Every day starts at 12:00 PM to 11:00 PM. If your hours are the same every day, tick Same hours every day, set them once and Clava fills in the rest. Click Continue.
You can change the hours at any time later (see Booking calendars).
Step 4: Settings
Choose how you want to manage bookings:
- Capacity-based counts guests. You type Total Venue Capacity, Online Bookable Capacity (what guests can book online — keep some room for walk-ins) and Max Guests per Online Booking. Best for venues that don't assign tables.
- Table-based assigns tables. You name your floors or areas and say how many tables for 2, 4, 6 and 8 guests each has. You need at least one table, or guests would have nothing to book. Best for restaurants with fixed seating.
Clava already fills in a suggestion for your business type. Click Continue.
Step 5: Review
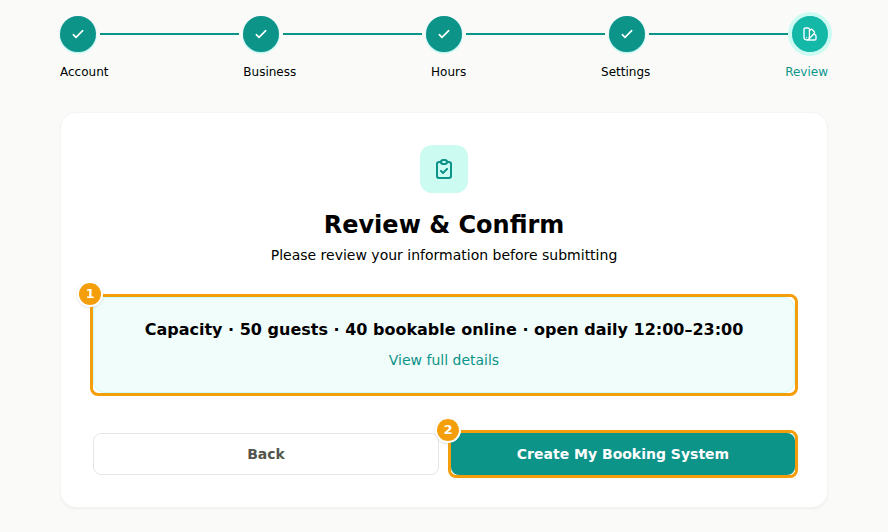
Step 5 shows a one-line summary (1) of what you chose — for example how many guests you seat and when you are open. View full details opens everything, and Back lets you correct it. When it is right, click Create My Booking System (2).
Confirm your email and switch on your system
- Clava sends an email to the address from step 1 and shows Verify Your Email. Open the email and click Verify Email Address. No email after a few minutes? Look in your spam folder, or click Resend Verification Email on the same page.
- Clava opens Account Activation. Click Set Up My System and wait a moment while Clava creates your business, calendar, venue and opening hours.
- Welcome to Clava! tells you the system is ready. Click Go to Dashboard.
Tip
No time to finish? Save & Continue Later, on the Verify Your Email page, is a link you can bookmark. It brings you back to the step where you stopped, with everything you typed. An unfinished sign-up is kept for seven days.
What happens next
You are signed in at once. You also get a welcome email with the temporary password Clava created. Before you open anything, Clava asks you to choose your own password — it is the page Choose your own password, and you don't need the temporary one for it (see Sign in to Clava). After that you land in Configuration, the area for the owner of the business (see Team roles).
The dashboard greets you with the checklist Grow your venue (see The dashboard). Your booking page already works: Clava made a starter website with it, so guests can book from day one. Make it yours in the website editor (see What the website editor does).
Your free trial
- You start on the Free plan with a 14-day trial of everything in Ultimate. No credit card is needed.
- The dashboard card Your Subscription says "You are testing the Ultimate plan for free" and how many days are left. Features that only the trial gives you are marked TRIAL in the menu.
- When the trial ends you stay on the Free plan, free of charge, unless you choose a paid plan with Choose a Plan. Nothing is charged by itself.
More about the plans and what each includes in Plans and billing.